Queen's Orchard Header Image

Showing posts with label tips. Show all posts

Tuesday, 25 April 2017

Tea fertilisers


Do you fancy a cup of tea?
Of course your plants would. But it has to be a special "tea" and it won't be served in a cup!
Studying organic matters and nutrients I came across "tea fertilisers", liquid fertiliser (power boost) that can be easily homemade for free.

The first one I have tried to make is the Nettle Tea Fertiliser.
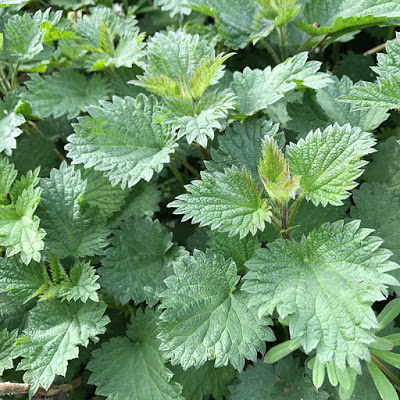
As the name can suggests, you need nettle (Urtica dioica),  and you need gloves to pick it up!
Despite the very unpleasant nature of this weed, it has three strong points on its side:

  1. It's rich in Nitrogen, useful element for growth of vegetative parts and photosynthesis.
  2. It can be a delicious ingredient for your meal (maybe I can write a post about it).
  3. And ...it is free and very common to find!

So all you need is 1Kg of Nettle's leaves per 1L of Water.
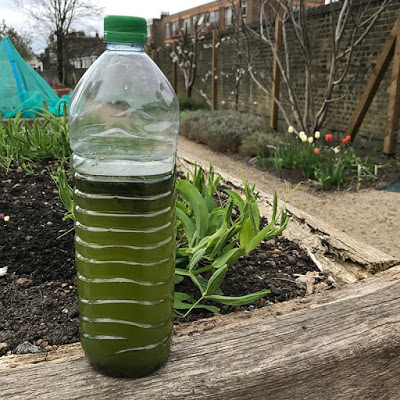
Put your nettle into a container full of water and let it rot for two weeks, stir every few days. It will smell very bad, DO NOT keep it inside the greenhouse as the smell  is really bad (evil, seriously!), but remember: No pain, no gain!
When it is ready, dilute 1:10 (nettle mix to water) in your watering can and use to watering your vegetable bed every two week.

The second recipe is the Comfrey Tea Fertiliser.
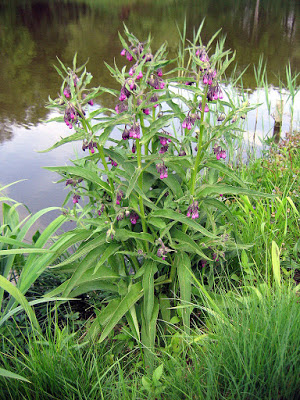
Comfrey - Source: Wikipedia

Comfrey (Symphytum officinale) is generally harder to find than nettles, it grows in damp, grassy places, it can be invasive, but it can also attract pollinators bees. This plant is also rich in Potassium: excellent for stimulating flowers and fruits.
At the moment I haven't seen any comfrey at the Queen's Orchard, so I will look for some Borage: they share the same family and possibly almost the same nutrient potential.
Doses and time of usage are the same of the Nettle's tea:
1Kg of Comfrey's leaves per 1L of Water.

When the tea is "ready", it need to be diluted 1:15 with your watering water.
Both these "tea" are fast release fertilisers, that means nutrients are available for the plant right away, but they loose their efficacy in little over two weeks and cannot be stored for a long time, so the best thing to do is making just the right amount on regular basis.

I've just used my Nettle fertiliser once, I will let you know the results eventually.
Have you tried any of these teas for your plants? Have you seen any improvements? Let me know in the comments below!

Tuesday, 14 February 2017

7 tips to prune a fruit tree

February: It's time to prune some fruit trees!
It has been a very busy start to the year, but Royal Parks' volunteers have been engaged in some very interesting activity during this short holiday period for the blog.
On 25th January we were lucky to host Ian Rodgers, the Arboriculture Manager of Royal Parks, for a pruning workshop at the Queen's Orchard.
Then on 7th of February, at the Kensington park allotment, we had another workshop with Amy Stone, environmental educator from Bristol.
Personally I think it is nice to listen to the same topic explained by different people, because they can develop the concept with a unique and personal approach, and you can get the best from both.
Speaking about pruning fruit trees, for example, you can be focus on obtaining the most of the fruits each year: remember, you cannot replace what you are cutting off!
Or you can take a long term view of a plant's growth and try to experiment and learn what to do year after year.
I think both methods are quite valid, the way to choose between the two approaches actually depends on many factors, but at the base of any approach you must know some fundamental rules.

1. One at the Time
Every species has a right time for pruning to take place: for example the Prunus family (cherries, plums, nectarines, apricots, almonds. See the first picture above) can not be cut in winter because they are easily exposed to Silver leaf and other diseases. The right time for pruning these species will be in summer after fruiting.

2. Look for DDD:
Take a good long look at your plant before starting to cut, can you see any Diseases, Dead or Damaged branch? They should be the first things getting cut.
In order not spread diseases from a plant to another use always clean your tools; rusty and unsharpened secateurs can be cleaned with specific disinfectant and a honing stone.

3. Get in Shape
A good shape means an healthy tree.
You want a well aerated crown where every branch can get the right amount of air and sun light. So branches that are growing toward the centre of the crown, crossing or simply sticking too close to each other, should be removed.
Also watch out for branches growing too close to the soil and stolons (suckers) at the base of your tree: they make the plant more vulnerable from pest attacks and steal energy from the main stem.

4. Stimulate growth
Usually apical buds, those at the tip of the branch, are "dominant", that means they are more developed than lateral buds and they release a hormone that prevent lower (axillary) buds from growing. They are usually floral buds that will develop flowers and fruit rather than leaves.
When the apical bud is removed the lower dormant buds are stimulated and develop new floral buds. This helps to rejuvenate the plant and maximise the production of fruits.
5. Chose the direction
Observe the position of the buds on the branch you want to cut. Try to maintain those that are growing in a convenient direction, i.e. those growing opposite to the centre or to other branches/barriers.
The position of the bud is also significant if you want speed the growth up of your tree or if you want to reduce it. Leaving the buds that are facing the soil will slow the downward growth of new shoots, because the hormones of growth tend to be on the upper side of the branch.

6. Not too close, not too far
Now you have chosen the exact point you are going to trim off, but be careful about the distance between the bud and the portion of the stem you are cutting: the bud can be easily damaged if the cut is too close to it, but on the other hand it can trap water and cause rotting if you cut it too far.
7.Get the angle right
Last but not least: the angle of your cut should be about 45ยบ in the same direction of the bud. Water will then just glide away from the bud without penetrating inside the wound.

That's all, I hope these simple rules can help you when pruning your fruit trees; please let me know if I have forgotten to mention something important in the comments and I will follow them up.